Growing out a pixie cut is often described as a test of patience, but it doesn’t have to be a period of “bad hair days.” The transition from a short crop to a bob or beyond is a unique stylistic journey that allows you to experiment with textures, accessories, and shapes you might never have considered before. The secret lies in embracing each phase rather than fighting it. By utilizing strategic trims, clever styling products, and a few creative hacks, you can navigate the “awkward stage” with grace. Here are 28 stunning ways to style your hair as it makes its way back to length.
1. Textured Pompadour
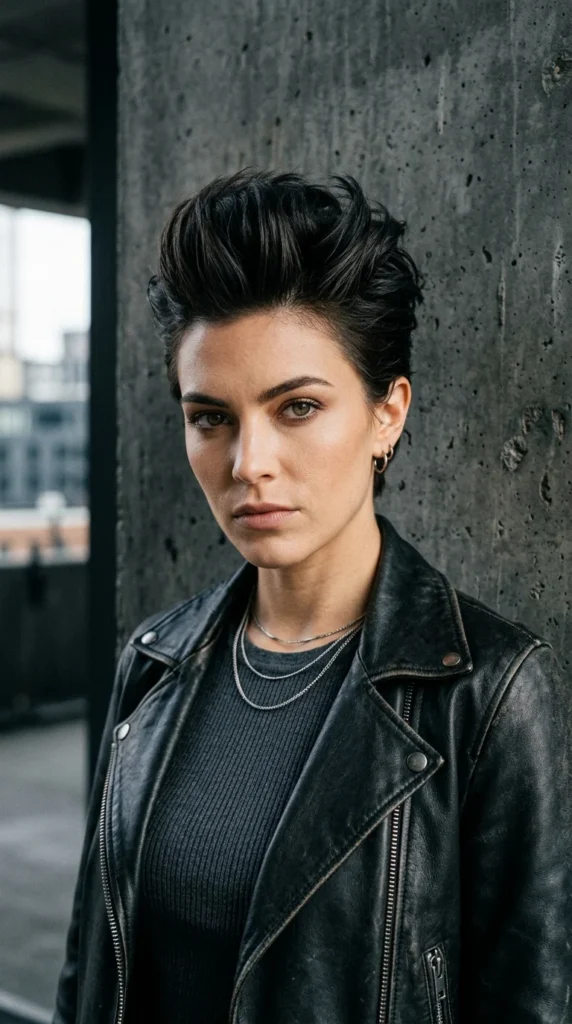
The pompadour is the ultimate “cool girl” transition style. When the top of your pixie starts getting long and heavy, use a volumizing mousse and a round brush to blow-dry the hair up and back. This keeps the hair out of your eyes and adds height, which balances out the growing length on the sides. It’s sophisticated, edgy, and perfect for the office or a night out.
2. Slicked Back
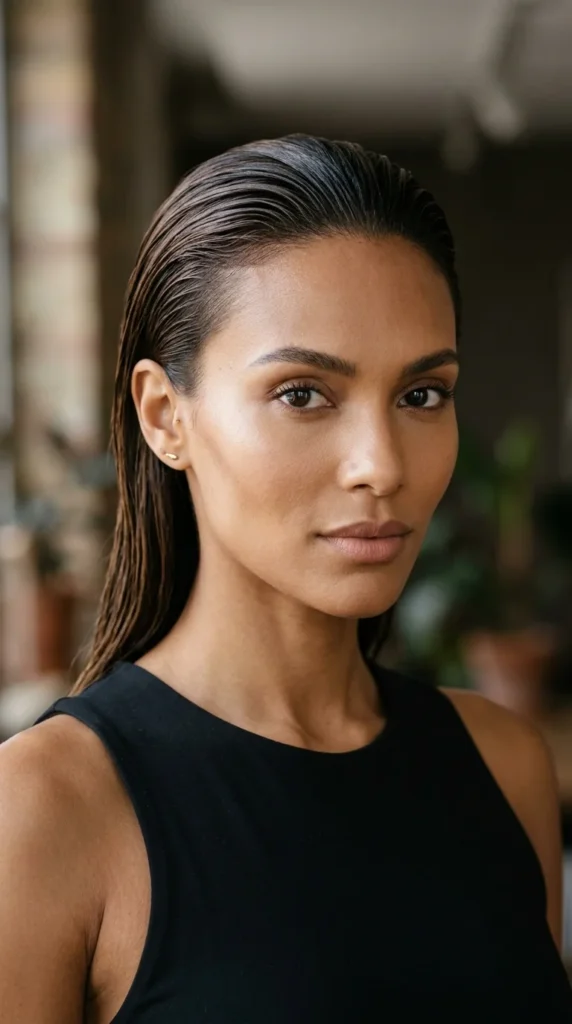
When your hair reaches that length where it’s too long to be a pixie but too short to tuck behind your ears, go for the “wet look.” Use a high-shine gel or a heavy-hold pomade to slick everything back. This style is incredibly high-fashion and eliminates the frustration of flyaways. It works best when the back is kept trimmed close to the neck to maintain a sleek silhouette.
3. Decorative Pins
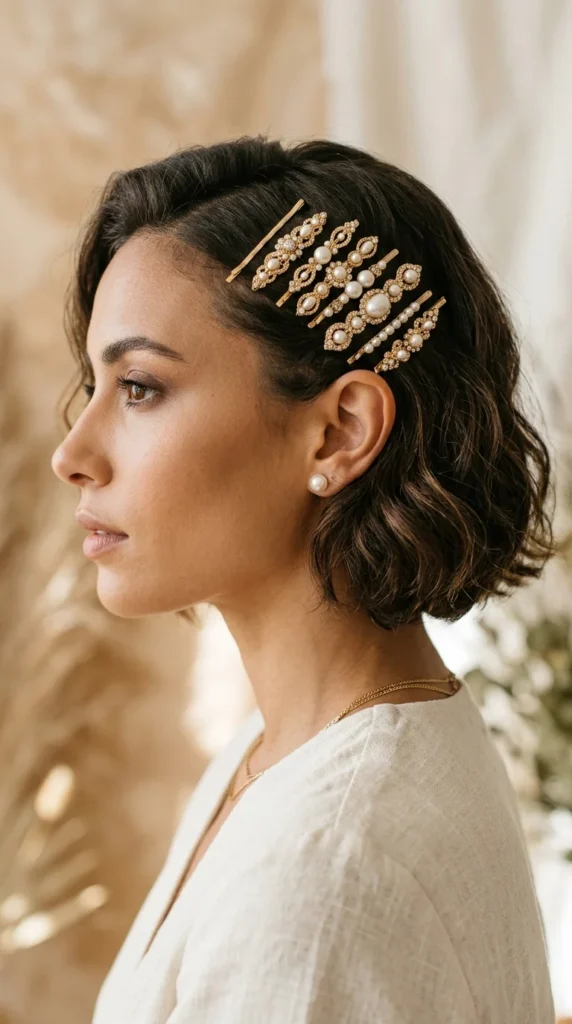
Accessories are your best friend during the growth process. If the hair around your temples is starting to feel unruly, use decorative bobby pins to secure it. Instead of hiding the pins, make them a statement. Criss-cross them in “X” shapes or line up three or four metallic pins in a row. It’s a functional way to manage “shaggy” sides while adding a touch of glamour.
4. Micro-Bangs
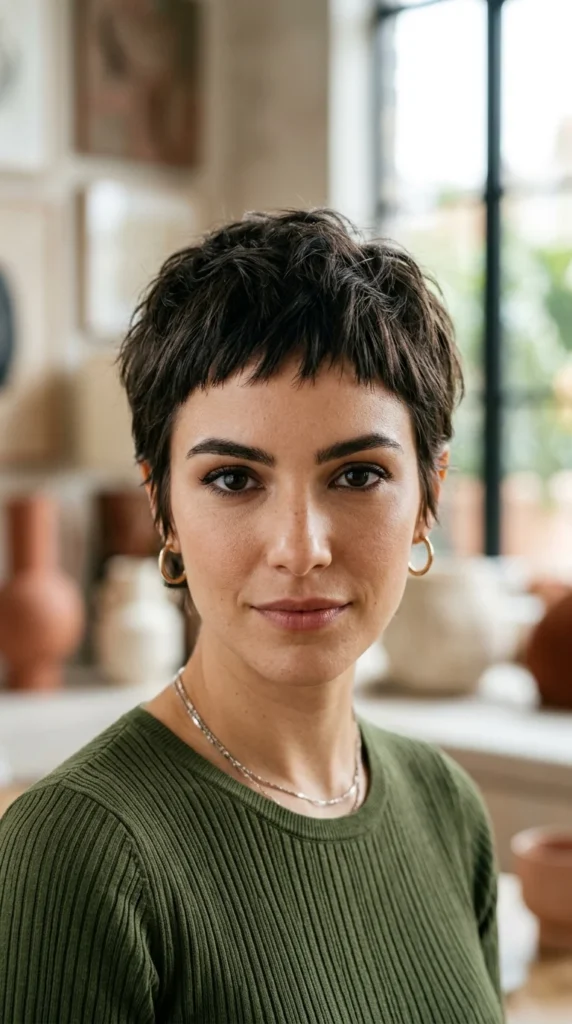
If the back of your hair is growing faster than the front, consider cutting micro-bangs. This creates an intentional, stylized look that screams “French girl chic.” Micro-bangs draw attention to your eyes and forehead, making the rest of the growth look like a deliberate choice rather than a transition.
5. Nape Trim
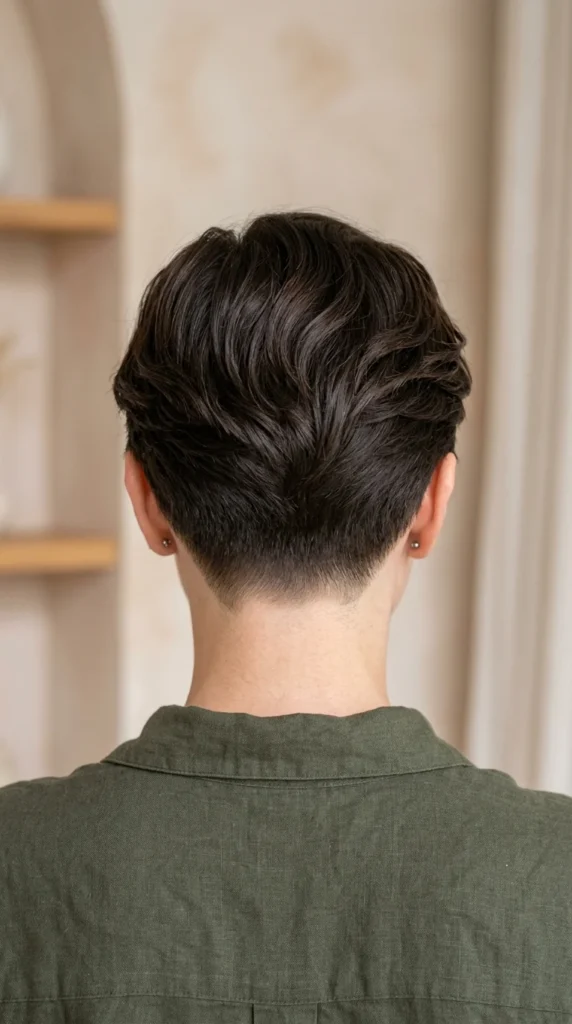
The number one rule of growing out a pixie is to keep the “mullet” at bay. As your hair grows, the hair at the nape of your neck will hit your collar faster than the rest. Visit your stylist every 6-8 weeks just to trim the very bottom edge. By keeping the back short while the top and sides catch up, you gradually transform your pixie into a chic, stacked bob.
6. Headband Tuck
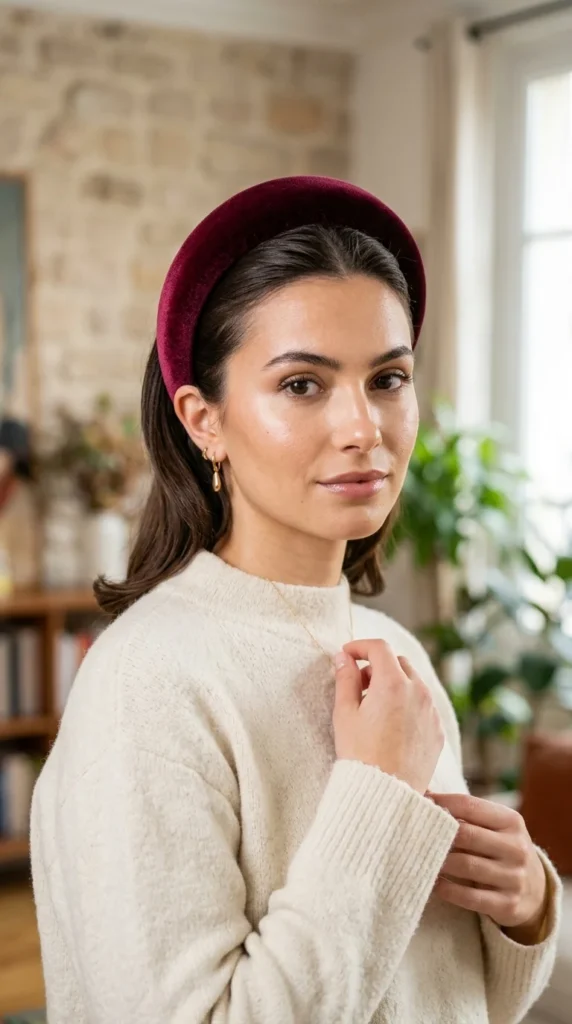
Headbands are the ultimate “cheat code” for awkward hair lengths. A wide, padded headband or a knotted fabric version can hide a multitude of sins, including messy roots or uneven layers. Place the headband about an inch back from your hairline and tuck the side pieces behind it to keep everything in place all day.
7. Side Sweep
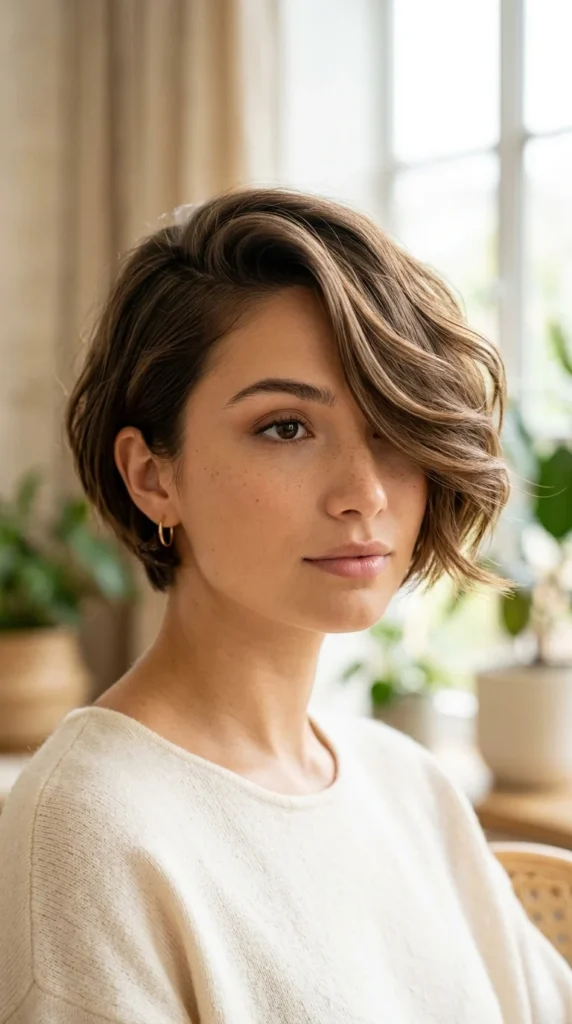
A deep side part can completely change the architecture of your face. By shifting your part significantly to one side, you create the illusion of longer layers. Use a bit of wax to piece out the ends, giving the hair a deliberate, asymmetrical look that feels modern and fresh.
8. Braided Fringe
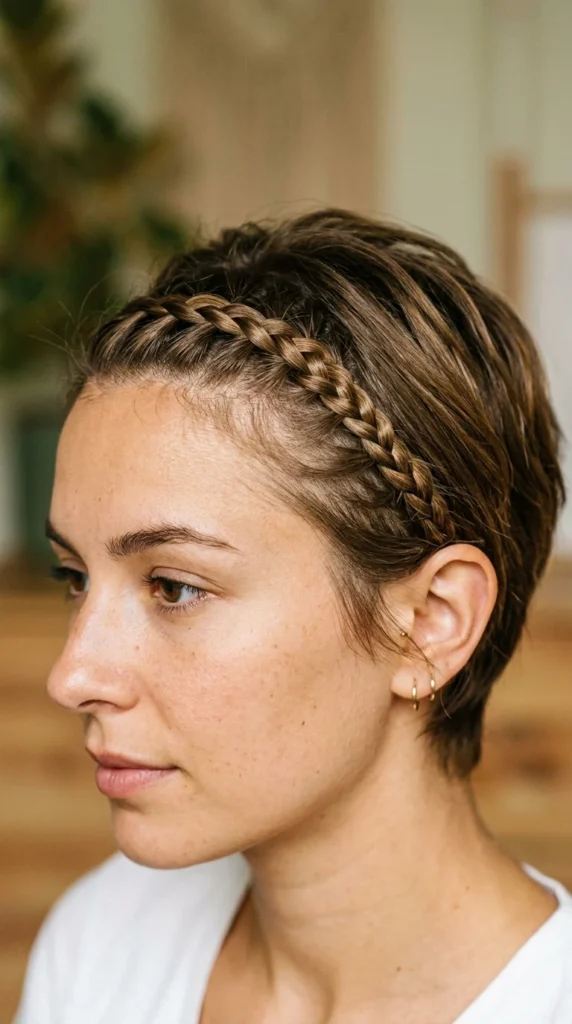
Even with only two or three inches of hair at the front, you can achieve a delicate braid. A French braid or Dutch braid along the hairline acts like a natural headband. This is particularly useful for active days or workouts when you want to keep sweat and hair away from your forehead.
9. Finger Waves
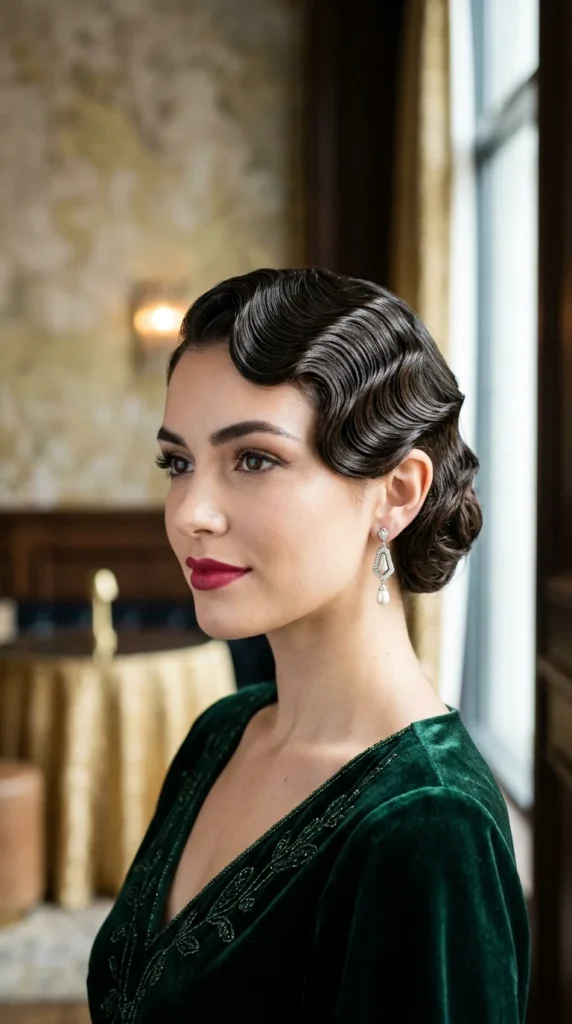
For formal events, lean into vintage aesthetics. Finger waves are perfect for short hair because they don’t require much length to look impactful. Use plenty of setting lotion and a fine-tooth comb to create those iconic “S” shapes. It’s a sophisticated way to handle layers that are currently too short to curl with an iron.
10. Half-Up Top Knot

Once your top layers reach your mid-ear, you can officially pull off the half-up top knot. This style is great for disguising different lengths. Simply gather the hair from the temples up and secure it with a small elastic. It’s casual, trendy, and keeps the hair out of your face.
11. Hidden Ear Tuck
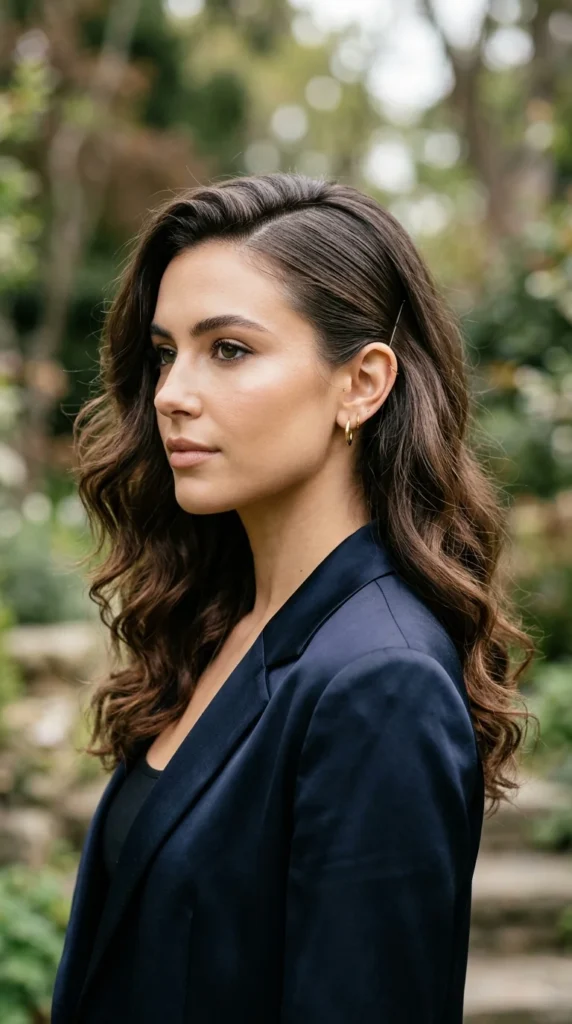
One of the milestones of growing out hair is the ability to tuck it behind your ears. If only one side stays put, use a flat bobby pin (the same color as your hair) to secure the hair behind the ear. This creates a clean, polished look and makes your hair appear more like a short bob than a long pixie.
12. Messy Shag

Embrace the chaos! Use a sea salt spray or texturizing paste to create a “shaggy” look. The goal here is to make the uneven layers look intentional. The shag is incredibly popular right now, so leaning into the messy, rock-and-roll vibe will make you look ahead of the trend.
13. Silk Scarf Wrap

When you’re having a particularly difficult hair day, reach for a silk scarf. You can wrap it around your head like a 50s starlet or tie it like a headband. This is a brilliant way to hide the “in-between” length at the back while highlighting your facial features.
14. Soft Curls
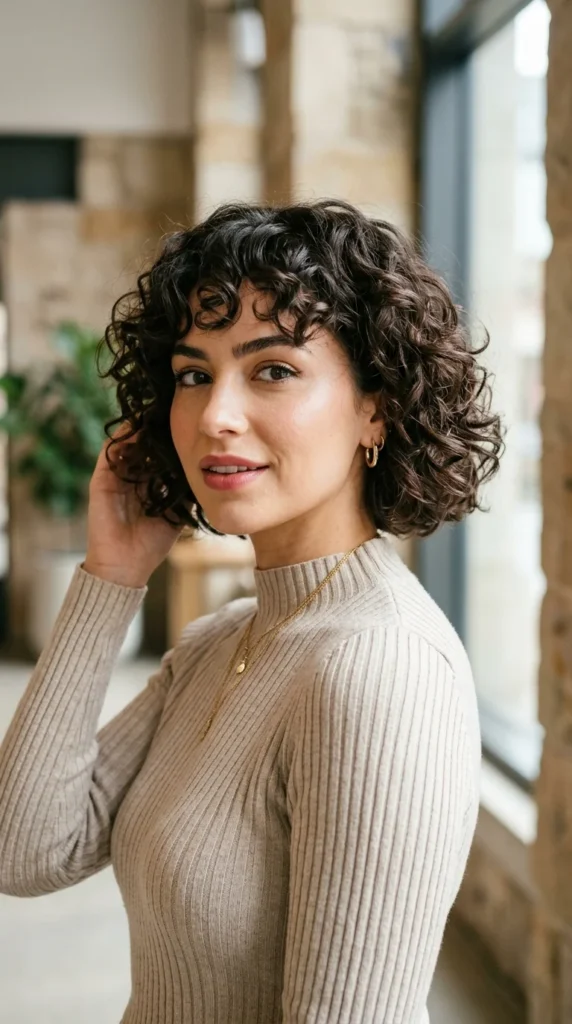
Adding a bit of curl can actually make the growing-out process easier. Curls hide uneven lengths and “stray” pieces that don’t quite fit into the rest of the style. Use a small curling wand to add random waves throughout, then finger-comb them for a soft, romantic finish.
15. The “Bixie”
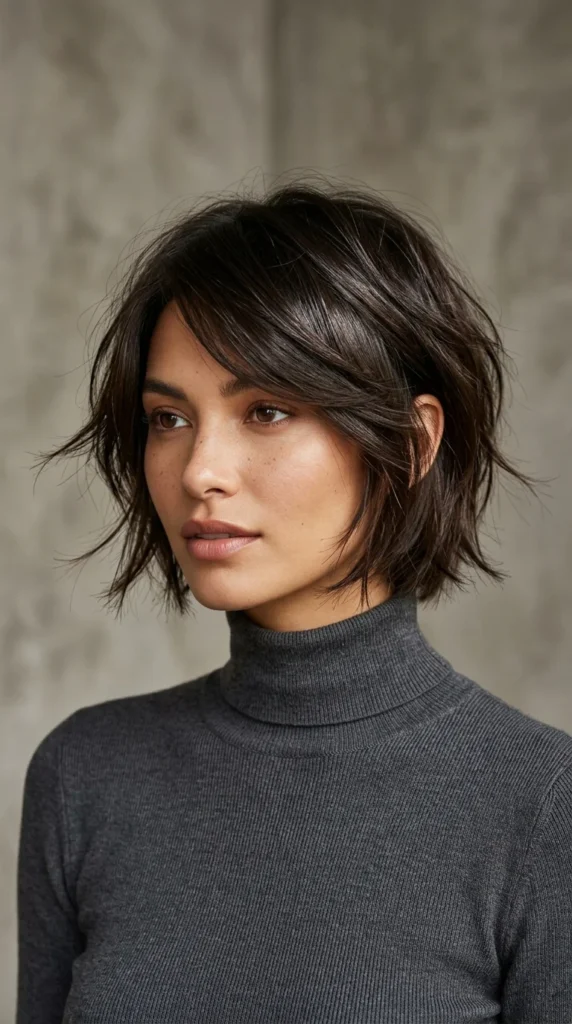
The “Bixie” is the literal bridge between a pixie and a bob. If your hair is naturally reaching this stage, ask your stylist to shape it. It involves keeping the top long and the perimeter shaggy. It’s a specific look that says, “I’m growing my hair out, and I’m doing it with style.”
16. Jeweled Barrettes
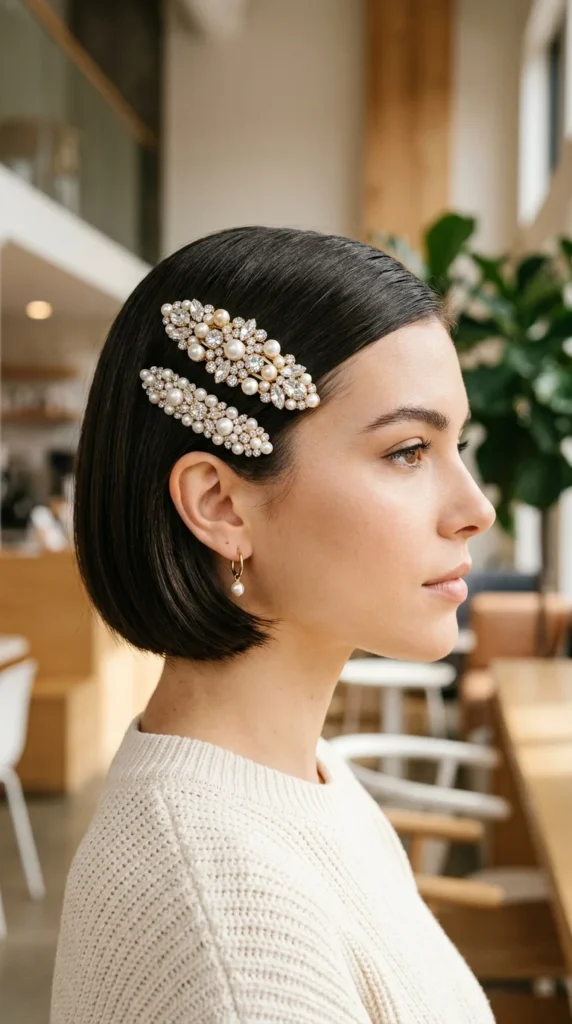
Statement barrettes are not just for long hair. A large, crystal-encrusted clip placed just above the ear can draw the eye away from uneven ends and toward the accessory. It adds a “finished” feel to even the simplest “wash-and-go” style.
17. Asymmetrical Part
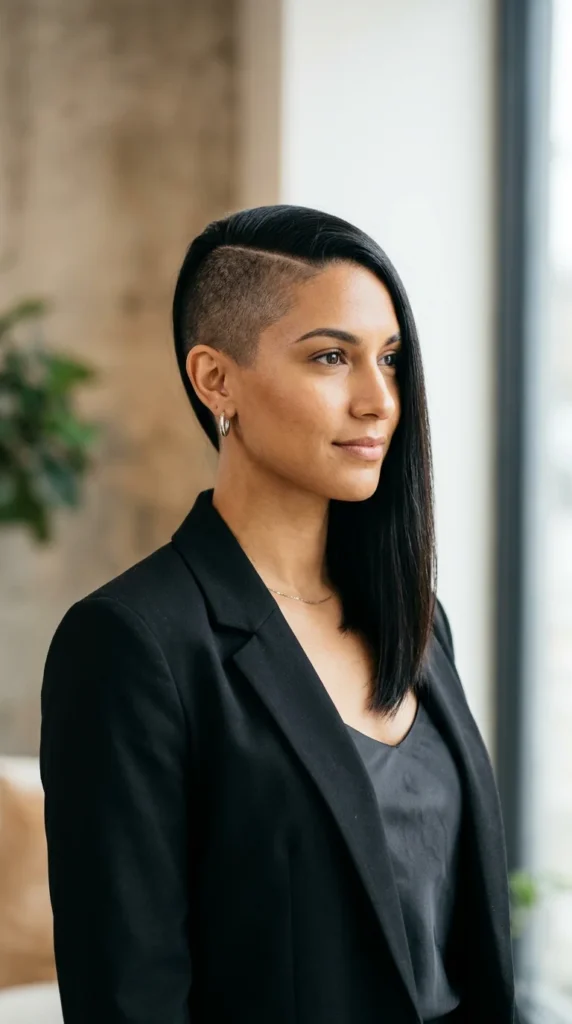
If one side of your hair seems to be behaving better than the other, use an asymmetrical part to highlight your “good” side. This creates a high-fashion, architectural look. Use a flat iron to keep the longer side sleek and straight to emphasize the intentionality of the cut.
18. Spiky Texture

For those in the very early stages of the grow-out, keeping things spiky and vertical can be very flattering. It prevents the hair from lying flat and looking “bowl-cut” adjacent. Use a lightweight wax and twist small sections of hair between your fingers.
19. Forward-Swept Fringe
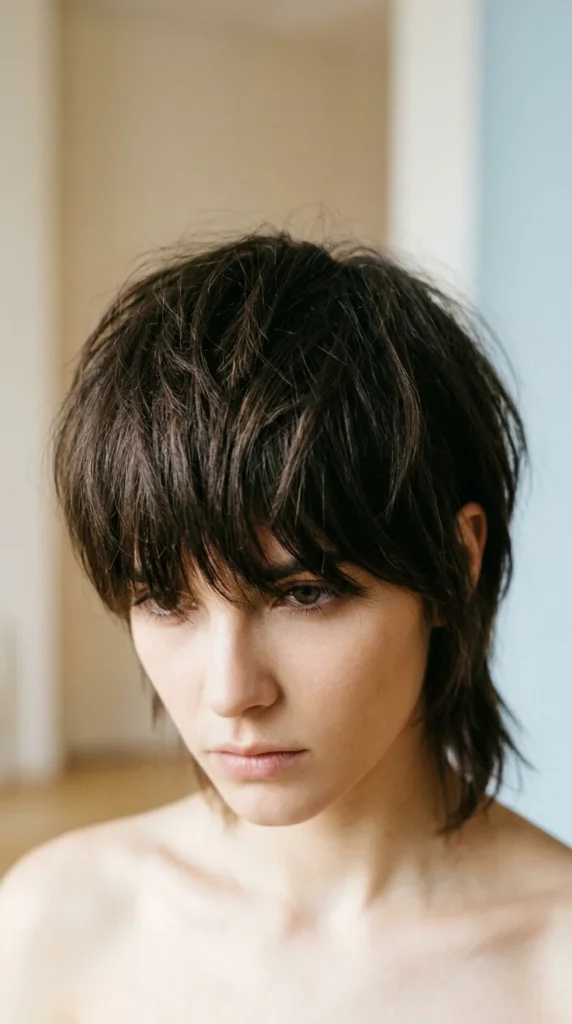
Instead of trying to push your hair back, bring it all forward. This creates a moody, mysterious look that works well with heavy layers. It’s a great way to hide a forehead that you might feel is too prominent when your hair is short.
20. Faux-Hawk
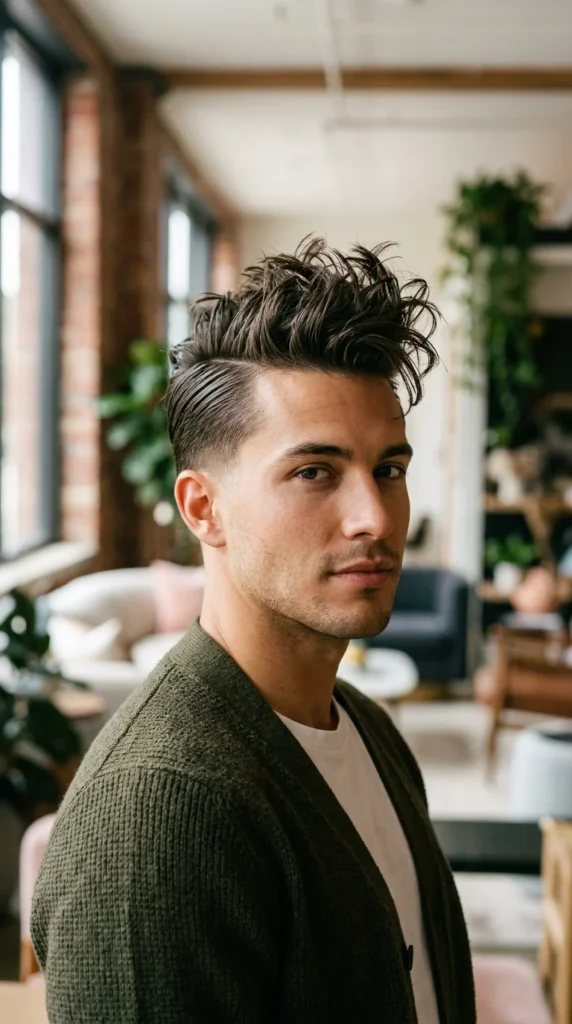
If you still have shorter sides but a lot of length on top, the faux-hawk is a fun, temporary style. Slick the sides back with gel and use a strong-hold spray to keep the middle section standing up. It’s bold, energetic, and hides the fact that your sides are in a transition phase.
21. Flat-Ironed Sleek

As soon as you have enough length to use a flat iron, do it. Straightening the hair to its maximum length can give you a boost of confidence by showing you exactly how far it has grown. Use a heat protectant and a shine serum to make the hair look glass-like and healthy.
22. Space Bun Accents
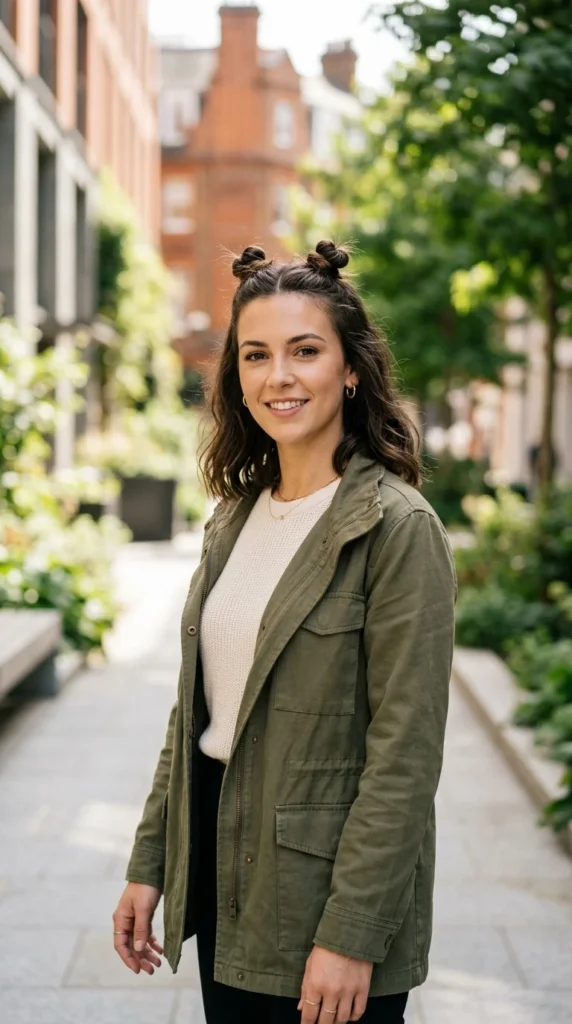
For a playful, youthful vibe, try “space buns.” Even if you can only grab a small amount of hair at the crown, two tiny buns look adorable and keep the longest parts of your hair secure. Leave the back of the hair down to show off your progress.
23. Low Taper
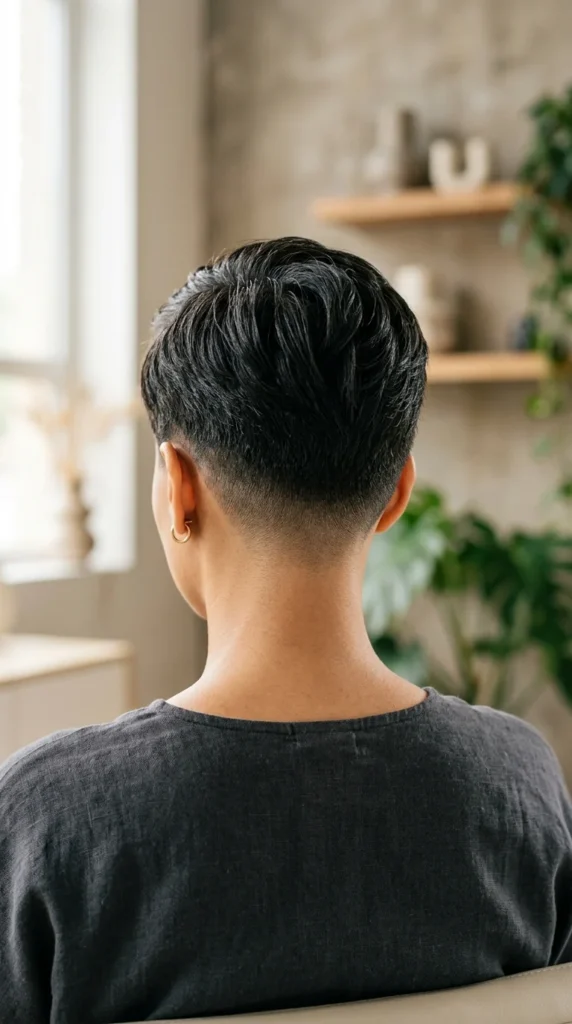
If you want to keep your growth looking professional, ask for a low taper at the back. This removes the “fuzz” that grows at the very base of the neck, giving the rest of your hair a clean line to grow into. It makes the transition to a bob look much more planned.
24. Voluminous Root Lift

Flat hair can make the growing-out process feel stagnant. Use a root-lift spray and blow-dry your hair upside down. The extra volume makes your hair look thicker and more substantial, which helps bridge the gap between a “short” and “medium” hairstyle.
25. The Wet Side-Part
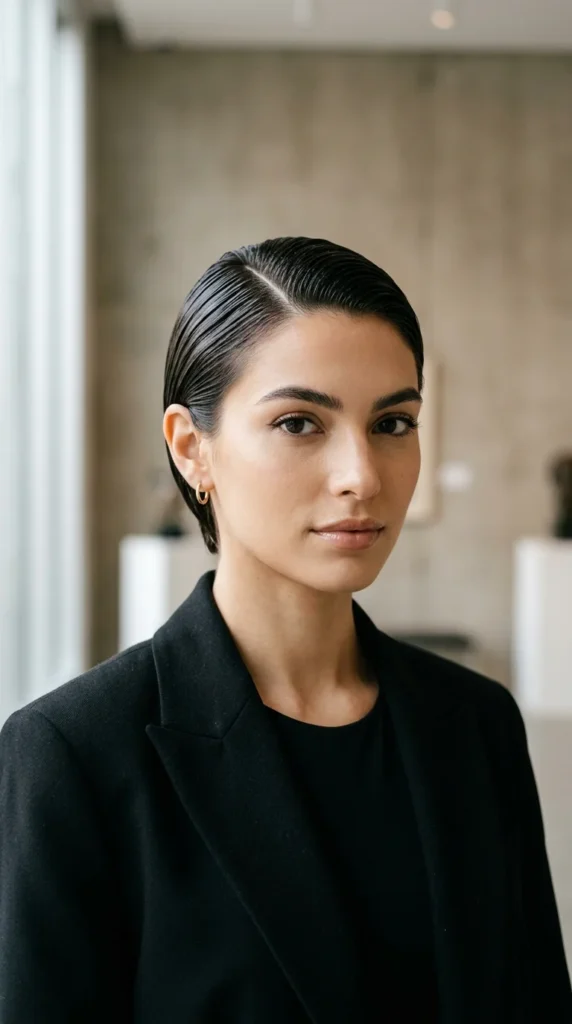
This is a classic “runway” look. It’s incredibly chic and requires very little length. By using a heavy-hold gel and a fine-tooth comb, you create a static, polished shape that doesn’t budge, which is a relief when you’re dealing with different hair lengths.
26. Curly Bangs
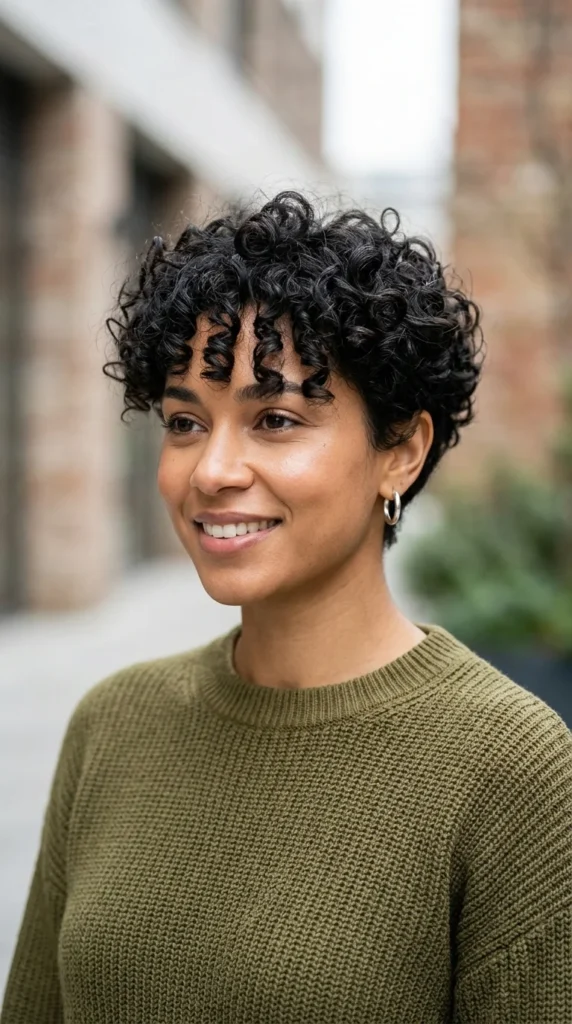
If you have natural curls, don’t try to straighten them during the grow-out. Let your bangs curl up! Curly bangs add a softness to the face and disguise the fact that the layers might be uneven. It’s a whimsical, effortless look.
27. Twisted Side Sections
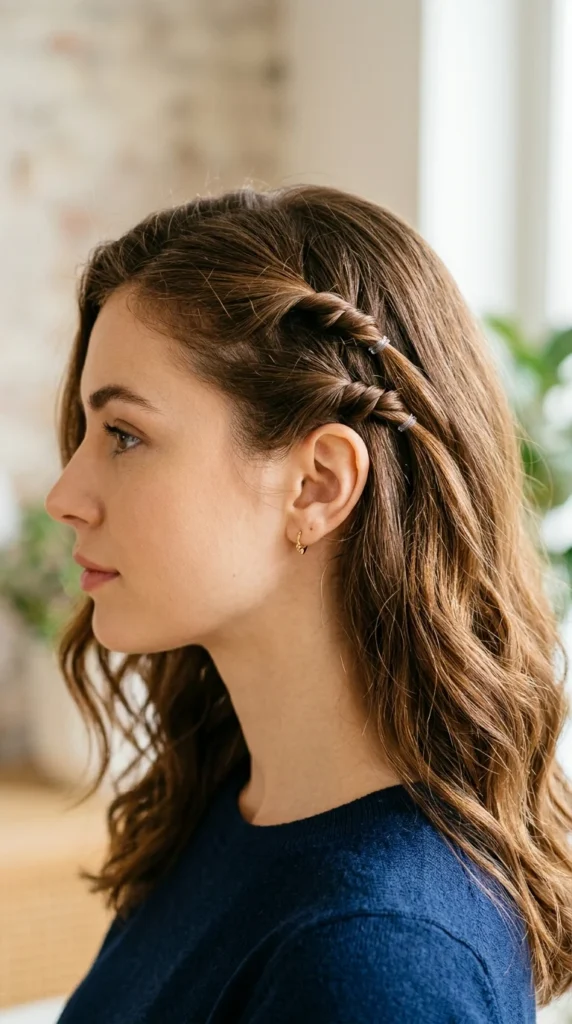
If your hair is too short to braid, try twisting. Take two small sections near the temple, twist them away from the face, and pin them back. It’s an easy way to add detail to your hair without needing professional styling skills.
28. The Classic Bob Transition
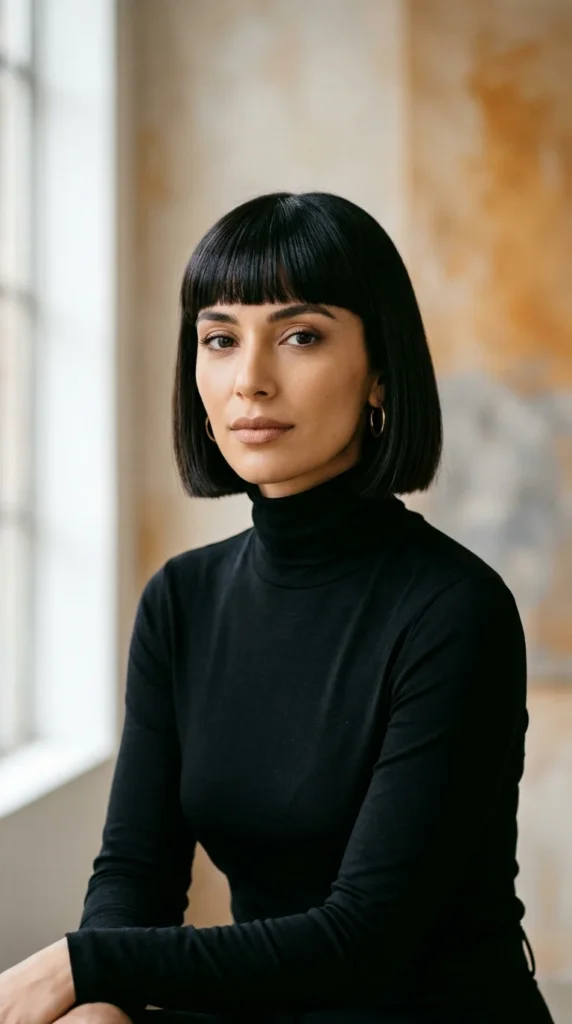
The final stage! Once the front layers meet the back, you can finally cut everything to one length. This blunt bob is the reward for all your patience. It looks thick, healthy, and marks the official end of the “pixie growth” journey. From here, the possibilities are endless.